| Author |
Message |
|
jangles
|
 Posted: Posted: Mon Jun 25, 2018 6:14 pm • # 1 |
|
 |
| Hero Member |
Joined: 05/28/18
Posts: 603
Location: Tucson , Hellazonia
|
So far I have the reel seat and cork handle on . The eyes marked and ready to wrap . Here's the catch , I can do the wrap pretty darn good BUT after I lock it down and think it's done things go to pot . I start to burnish it and when going side to side with the curved side and turning the blank the part I just locked down , over a 1/4 inch comes unraveled . This has been happening for 3 days and I'm livid . Any ideas ? TIA . 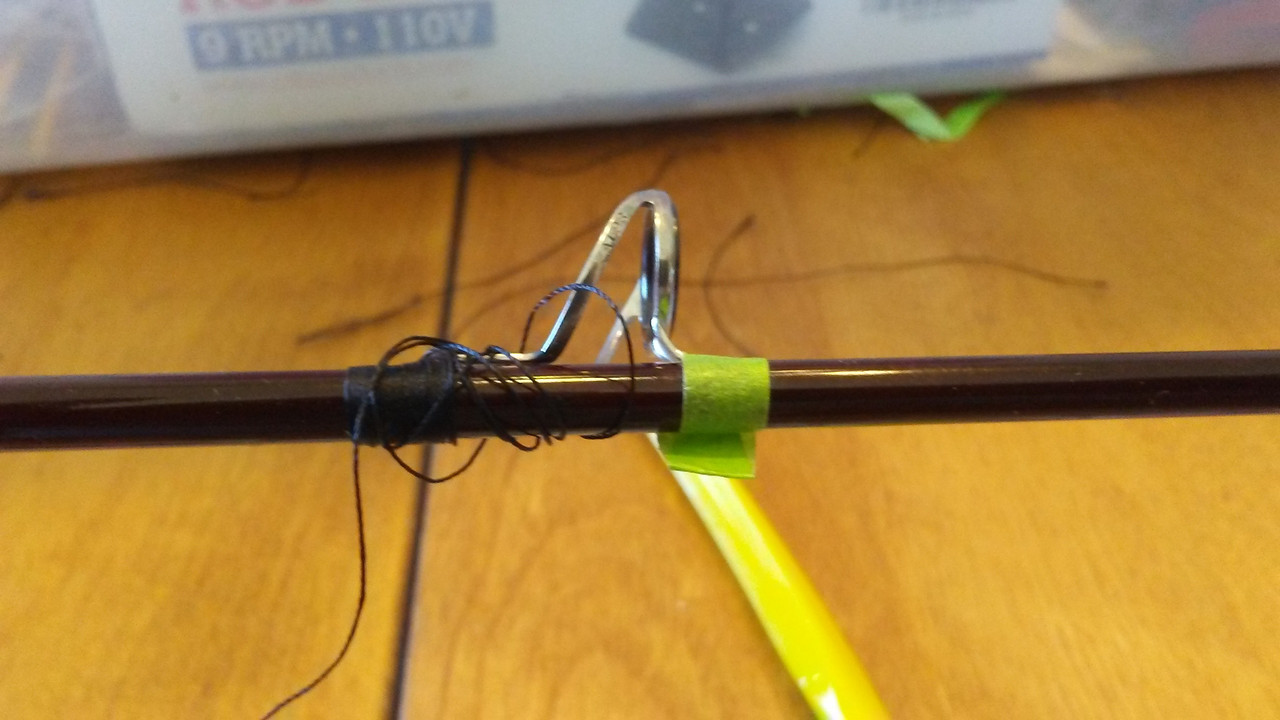
Last edited by jangles on Mon Jun 25, 2018 11:34 pm, edited 1 time in total.
|
|
| Top |
|
|
Knotty
|
Posted: Mon Jun 25, 2018 9:51 pm • # 2 |
|
 |
| Hero Member |
Joined: 08/27/15
Posts: 781
Location: New Jersey
|
|
| Top |
|
|
jangles
|
Posted: Mon Jun 25, 2018 11:36 pm • # 3 |
|
|
| Hero Member |
Joined: 05/28/18
Posts: 603
Location: Tucson , Hellazonia
|
|
| Top |
|
|
PampasPete
|
Posted: Tue Jun 26, 2018 4:28 pm • # 4 |
|
|
| Hero Member |
Joined: 09/09/14
Posts: 520
Location: southern Brazil
|
|
It’s nice to see that you decided to go forward with your project.
Without speaking as to how others handle the same situation, here’s how I deal with it, which amounts to a whip finish knot.
When the wraps are ready to be tied off, I place a loop of tippet material (4 or 5X) or thin wire parallel to the blank at the end of the existing wraps. Some 5 or 6 more wraps go over the loop, the end of the thread goes through the loop, then the whole deal (loop and thread, with enough slack in the thread) gets carefully pulled back under the last 5 or 6 wraps, and the tag end gets cut off.
Hope that helps!
|
|
| Top |
|
|
jangles
|
Posted: Tue Jun 26, 2018 4:55 pm • # 5 |
|
|
| Hero Member |
Joined: 05/28/18
Posts: 603
Location: Tucson , Hellazonia
|
|
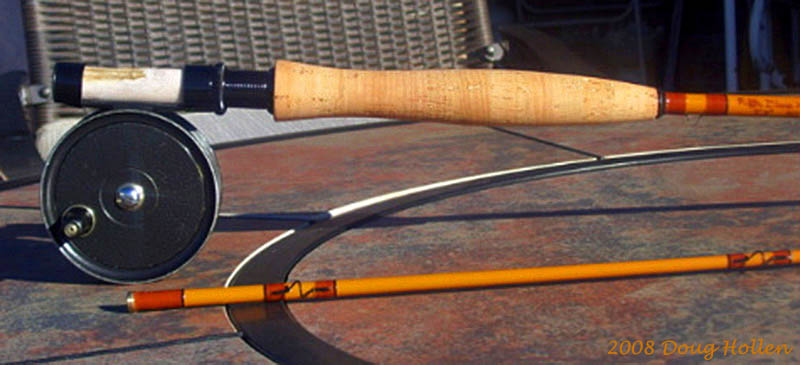
Thanks Pampass Pete , that's what I have been doing . I'm sure glad I ordered another 7'6" 1wt from Steve at Midwest, at least I'll have it for my trip in Aug !
Last edited by jangles on Mon Oct 29, 2018 10:19 pm, edited 1 time in total.
|
|
| Top |
|
|
PampasPete
|
Posted: Tue Jun 26, 2018 8:04 pm • # 6 |
|
|
| Hero Member |
Joined: 09/09/14
Posts: 520
Location: southern Brazil
|
|
Strange, that has always worked for me, but so far I have always skipped the burnishing step. Perhaps you need a bit more thread tension. If that doesn’t work, you might try a tiny drop of super-glue or head cement where the tag gets cut off before going any further. Or even try burnishing in a different direction.
|
|
| Top |
|
|
fastyacht
|
Posted: Tue Jun 26, 2018 10:43 pm • # 7 |
|
 |
| Jr. Member |
Joined: 09/28/16
Posts: 77
|
|
That is heavy thread--looks it--is that D? A is probably sufficient.
"burnishing" with the tag trimmed off will always open it up. The threads are being moved when you do that and the end will pull through. Don't trim it off if you insist on burnishing. Frankly I see no reason to if you got it looking good. Most important thing is wraps touching throughout. That should be the focus of any burnishing and again, as you do that, you will by definition be loosening the wraps so the tag should not be trimmed and you should tighten it occasionally.
I'm by no means an expert but this is what I've found.
PS if you superglue before burnishing everything will go loose. Make sure it is tight as you go over it as I describe above.
Also I go more than 7. I do more like 12. But experts can do less. The narrow colour changes are real tests of skill.
|
|
| Top |
|
|
jangles
|
Posted: Tue Jun 26, 2018 11:05 pm • # 8 |
|
|
| Hero Member |
Joined: 05/28/18
Posts: 603
Location: Tucson , Hellazonia
|
|
PampasPete, I appreciate all your help . It makes sense to me that burnishing is my enemy . I have been wrapping all day and every time I do it comes apart but not when I don't . I'm trying to keep my rows nice and tight . I have five on but probably wont use them .
In my tantrum the other day I just tossed the snake eye that weren't already on and now I'm in a quandary . Is there a way (other than to eyeball ) to measure the guides with a mic or something so I can put the right guides in the proper places ?
|
|
| Top |
|
|
jangles
|
Posted: Tue Jun 26, 2018 11:18 pm • # 9 |
|
|
| Hero Member |
Joined: 05/28/18
Posts: 603
Location: Tucson , Hellazonia
|
Thanks fastyacht , I appreciate your help also . Yes that is size D thread . I got that with the Mud Hole kit I ordered . Here is a picture of that stripper guide after many tries . Still not where I want to be before putting finish on it . 
|
|
| Top |
|
|
fastyacht
|
Posted: Thu Jun 28, 2018 11:10 am • # 10 |
|
|
| Jr. Member |
Joined: 09/28/16
Posts: 77
|
|
I put shellac on a job I did--because it "wasn't good enough" but I wanted to go fishing. I can dissolve it off later with methylated spirits. You can always do that if you want to go fish it now :-)
|
|
| Top |
|
|
fastyacht
|
Posted: Thu Jun 28, 2018 11:15 am • # 11 |
|
|
| Jr. Member |
Joined: 09/28/16
Posts: 77
|
jangles wrote: PampasPete, I appreciate all your help . It makes sense to me that burnishing is my enemy . I have been wrapping all day and every time I do it comes apart but not when I don't . I'm trying to keep my rows nice and tight . I have five on but probably wont use them .
In my tantrum the other day I just tossed the snake eye that weren't already on and now I'm in a quandary . Is there a way (other than to eyeball ) to measure the guides with a mic or something so I can put the right guides in the proper places ? Do you mean in line, or the longitudinal spacing? For keeping in a line you use your old eyeball sighting down the line from the end. Before you put varnish on, you can very gently rotate the guide under the threads to get it perfect. I checked a book out of the library that was very good. It was called "Rodbuilding Guide." HEre is an excerpty: 
|
|
| Top |
|
|
jangles
|
Posted: Thu Jun 28, 2018 11:25 pm • # 12 |
|
|
| Hero Member |
Joined: 05/28/18
Posts: 603
Location: Tucson , Hellazonia
|
Thanks fastyacht , I actually meant the size of the guides themselves like 1, 2, 4 etc but I have remedied this problem . I ordered all new guides and specified that I wanted them numbered so I'd know !! I also got about 30$ worth of thread .  I cant decide which colors I want to make the wraps now . Practice , practice .
|
|
| Top |
|
|
strummer
|
Posted: Fri Jun 29, 2018 3:01 am • # 13 |
|
 |
| Hero Member |
Joined: 06/13/16
Posts: 936
Location: Southwest Florida
|
|
Insufficient tension, perhaps?
If you grab a Mudhole catalog, they usually have a chart that shows the sizes of guides. You can kinda eyeball them. I think it's taken from the cheap Flex Coat book "Step by Step Rod bulilding".
Oh, and it still functions well if you accidentally switch guides. Don't ask me how I know. And please don't look at my six weight...
|
|
| Top |
|
|
jangles
|
Posted: Fri Jun 29, 2018 10:16 am • # 14 |
|
|
| Hero Member |
Joined: 05/28/18
Posts: 603
Location: Tucson , Hellazonia
|
|
The chart is on my rod wrapper too but cant really tell so I ordered al new one . They're cheap enough . Thanks Strummer .
|
|
| Top |
|
|
SWCR
|
Posted: Fri Jun 29, 2018 11:05 am • # 15 |
|
|
| Full Member |
Joined: 05/02/13
Posts: 136
|
|
Should only need 3 guide sizes on that build. 1 stripper, 1 transition, and all the same running guides
|
|
| Top |
|
|
jangles
|
Posted: Fri Jun 29, 2018 5:01 pm • # 16 |
|
|
| Hero Member |
Joined: 05/28/18
Posts: 603
Location: Tucson , Hellazonia
|
|
Well I know that you are a rod builder and so is the guy I bought my kit from . I think I'll use what he told me to . Thx for your input .
|
|
| Top |
|
|
SWCR
|
Posted: Fri Jun 29, 2018 11:26 pm • # 17 |
|
|
| Full Member |
Joined: 05/02/13
Posts: 136
|
|
Thats where the difference between traditional and performance come in. Both will work
|
|
| Top |
|
|
jangles
|
Posted: Wed Jul 04, 2018 10:57 am • # 18 |
|
|
| Hero Member |
Joined: 05/28/18
Posts: 603
Location: Tucson , Hellazonia
|
SWCR wrote: Thats where the difference between traditional and performance come in. Both will work I have another 1wt , same blank . I'll build your way and test that theory . So far I have just been practicing my wraps and they are getting better . BTW , I saw some of you builds on AZ site and they are amazing .
|
|
| Top |
|
|
SWCR
|
Posted: Fri Jul 06, 2018 1:28 am • # 19 |
|
|
| Full Member |
Joined: 05/02/13
Posts: 136
|
|
I actually have a 7'6" 1wt on the wrapper as we speak. It will be super lite, also.
|
|
| Top |
|
|
jangles
|
Posted: Sat Jul 07, 2018 6:12 pm • # 20 |
|
|
| Hero Member |
Joined: 05/28/18
Posts: 603
Location: Tucson , Hellazonia
|
SWCR wrote: I actually have a 7'6" 1wt on the wrapper as we speak. It will be super lite, also. Nice , post pictures when it's done .
|
|
| Top |
|